用solana 鑄幣

用solana 鑄幣

建議是在linux 環境下執行

如果是windows 可以使用wsl2,以下為指令

  • 列出所有可安裝的linux 版本

    1
    wsl --list --online
  • 安裝特定版本

    1
    wsl --install -d Ubuntu-22.04
  • 啟動特定版本

    1
    wsl -d Ubuntu-22.04
  • 安裝C/C++ 編譯器

    1
    2
    sudo apt update
    sudo apt install -y build-essential

1. 安裝solana cli

1
sh -c "$(curl -sSfL https://release.solana.com/v1.9.0/install)"

2. 建立錢包

1
solana-keygen grind --starts-with bos:2

:2 的意思是建立的個數,會建立以下的json,前面的檔名就是錢包地址

1
2
3
4
5
6
7
Searching with 22 threads for:
2 pubkeys that start with 'bos' and end with ''
Searched 1000000 keypairs in 1s. 0 matches found.
Searched 2000000 keypairs in 3s. 0 matches found.
Wrote keypair to bosNq2bnxU1xrzV4oPRtzBwYftbcfyuKP9YjYnz2zr2.json
Searched 3000000 keypairs in 5s. 1 matches found.
Wrote keypair to bos4qUdiXHGb6Ks36GLx9mZtiXmujYsdryi1xQZHheZ.json

3. 設定config

1
2
3
4
5
# 設定為devnet
solana config set --url https://api.devnet.solana.com

# 設定錢包
solana config set --keypair bosNq2bnxU1xrzV4oPRtzBwYftbcfyuKP9YjYnz2zr2.json
  • 查看config

    1
    solana config get
    1
    2
    3
    4
    5
    Config File: /home/dean/.config/solana/cli/config.yml
    RPC URL: https://api.devnet.rpcpool.com
    WebSocket URL: wss://api.devnet.rpcpool.com/ (computed)
    Keypair Path: bosNq2bnxU1xrzV4oPRtzBwYftbcfyuKP9YjYnz2zr2.json
    Commitment: confirmed

4. 取得空投

由於後續的操作都需要手續費,所以需要先取得空投

1
solana airdrop 1

或是可以到https://faucet.solana.com/ ,複製剛剛取得的錢包地址,點選request airdrop

取得後可以查看錢包

1
solana balance
1
5 SOL

5. 建立mint

先建立keypair

1
solana-keygen grind --starts-with mnt:2
1
2
3
4
5
6
7
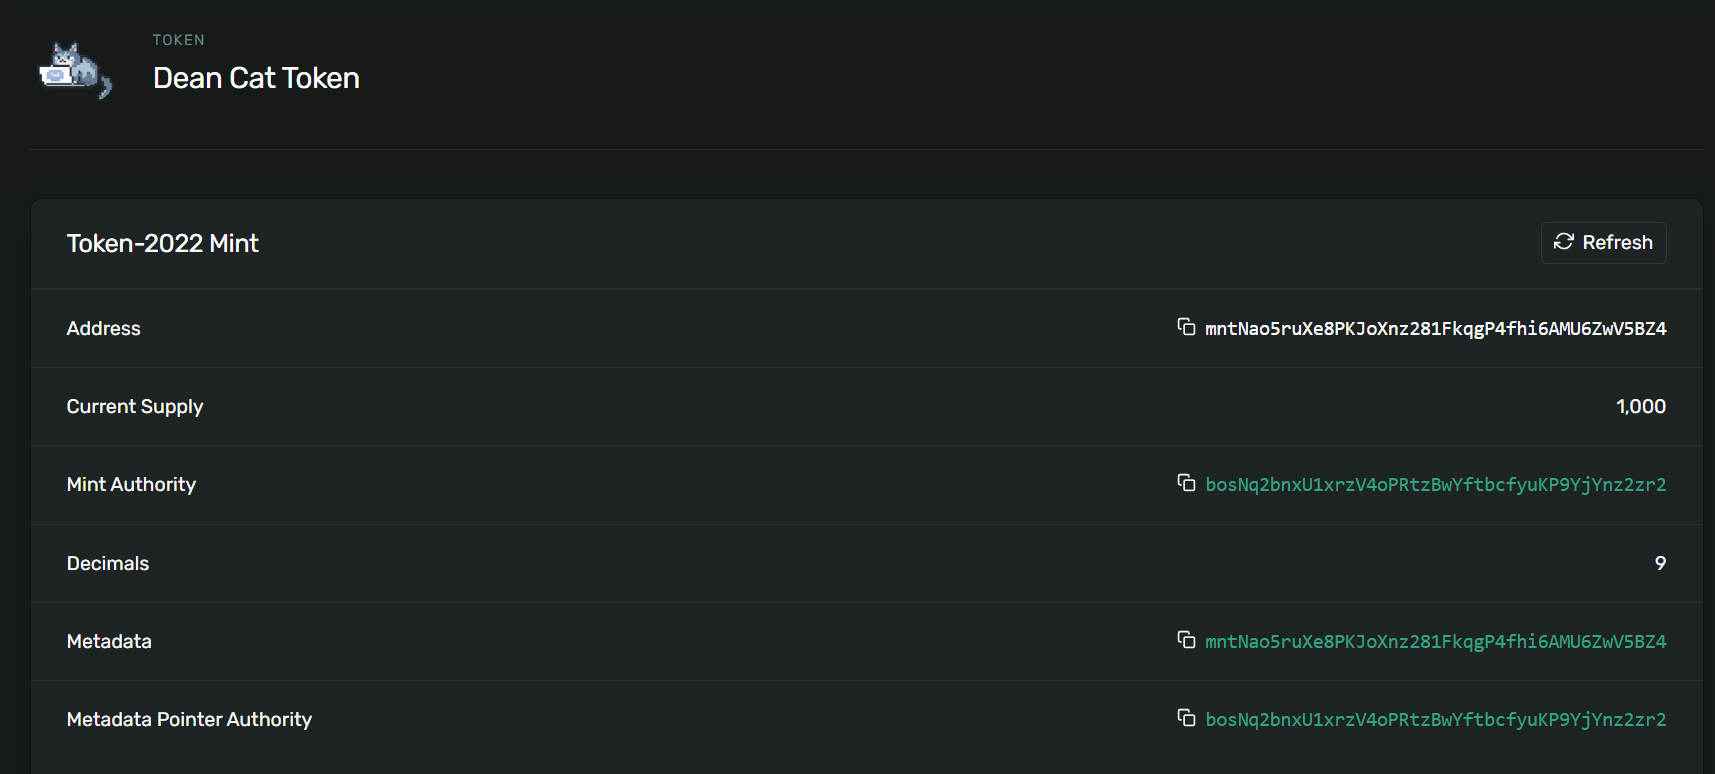
Searching with 22 threads for:
2 pubkeys that start with 'mnt' and end with ''
Searched 1000000 keypairs in 1s. 0 matches found.
Searched 2000000 keypairs in 3s. 0 matches found.
Searched 3000000 keypairs in 5s. 0 matches found.
Wrote keypair to mnt6xLhrLGXya1swUvm27jRCvn6hP6YbWoqRbXPqKvL.json
Wrote keypair to mntNao5ruXe8PKJoXnz281FkqgP4fhi6AMU6ZwV5BZ4.json

建立token mint

可以去這裡取得 program id https://solana.com/developers/guides/token-extensions/getting-started

由於等等要加入 metadata,所以需要加入 –enable-metadata

1
spl-token create-token --program-id TokenzQdBNbLqP5VEhdkAS6EPFLC1PHnBqCXEpPxuEb --enable-metadata mntNao5ruXe8PKJoXnz281FkqgP4fhi6AMU6ZwV5BZ4.json
1
2
3
4
5
6
7
Creating token mntNao5ruXe8PKJoXnz281FkqgP4fhi6AMU6ZwV5BZ4 under program TokenzQdBNbLqP5VEhdkAS6EPFLC1PHnBqCXEpPxuEb
To initialize metadata inside the mint, please run `spl-token initialize-metadata mntNao5ruXe8PKJoXnz281FkqgP4fhi6AMU6ZwV5BZ4 <YOUR_TOKEN_NAME> <YOUR_TOKEN_SYMBOL> <YOUR_TOKEN_URI>`, and sign with the mint authority.

Address: mntNao5ruXe8PKJoXnz281FkqgP4fhi6AMU6ZwV5BZ4
Decimals: 9

Signature: 3S3wAKhzkCwHTKvCc4znECNfSB3PYtenZ9TjWLhYygPr56ZrgZW1FqJirSJqicZhhvRarrUywvkgT8NSpYz9u9VF

初始化metadata

先將json 及 圖片檔上傳至可以直接打開的地方,這裡以github 為例可以先到連結處,後面加上?raw=true,這樣就可以直接打開

1
https://github.com/shengshengyang/Solana-test-coin/blob/main/metadata.json?raw=true

會重導到以下網址

1
https://raw.githubusercontent.com/shengshengyang/Solana-test-coin/refs/heads/main/metadata.json

初始化metadata

1
spl-token initialize-metadata mntNao5ruXe8PKJoXnz281FkqgP4fhi6AMU6ZwV5BZ4 'Dean Cat Token' 'TST' https://raw.githubusercontent.com/shengshengyang/Solana-test-coin/refs/heads/main/metadata.json

可以發現圖片跟資訊都上去了,以下參考
https://explorer.solana.com/address/mntNao5ruXe8PKJoXnz281FkqgP4fhi6AMU6ZwV5BZ4?cluster=devnet

6. 建立token account

1
2
spl-token create-account mntNao5ruXe8PKJoXnz281FkqgP4fhi6AMU6ZwV5BZ4
Creating account EqihFdtYEB7uywF2Nij6pCsDn7Adfg225gLEQ83K1u5s

7. 鑄幣

鑄造1000 個token

1
spl-token mint mntNao5ruXe8PKJoXnz281FkqgP4fhi6AMU6ZwV5BZ4 1000

鑄完之後會發現sol 變少了(被當成gas fee),但是token account 多了1000 個token,代表鑄幣 成功!

dean_coin.png

8. 轉帳

1
2
3
4
spl-token transfer \
mntNao5ruXe8PKJoXnz281FkqgP4fhi6AMU6ZwV5BZ4 \
AMOUNT \
RECIPIENT_TOKEN_ACCOUNT

結語

以上純屬開發好玩用,無任何實際幣的價值,請勿將此當作真正的錢包使用,謝謝


用solana 鑄幣
https://shengshengyang.github.io/2025/01/23/solana-cli/
作者
Dean Yang
發布於
2025年1月23日
許可協議