gh-pages坑
原先是按照網路上各種方去做hexo 的部屬
推薦以下
標籤 - 2021 iThome 鐵人賽:30 天利用 Hexo 打造技術部落格
但會有幾個點在更新的現在需要去做修正
Hexo theme的使用
- 在網路上最常見的用法, 將next 載入 theme中,然後更改_config.yml
1 | |
1 | |
但此方法會有幾個問題,其一是在本地端修改thems/next/_config.yml, 針對theme做的課制修正只會留在本機,而由於我希望的做法是在做git push 時 透過Github Action去做自動化部屬,無法推上去的config 就會造成問題
2. 網路上看到的第二種方式是透過fork,再將其作為submodule來當作基底
在 hexo 中使用 git submodules 管理主题 - 掘金
要注意這邊要先將project fork 成自己的repo,再透過sumodule 指向自己的專案,不然會造成在push時會嘗試推到作者的repo…….<沒錯我差點就試推了,好險有跳警告>
透過npm 及自訂config 來做整理
目前已可透過npm 來安裝 next theme
1
npm install hexo-theme-next如果打開theme/next 裡面的_config.yml 會發現他開頭寫
1
2
3
4
5# If false, merge configs from `_data/next.yml` into default configuration (rewrite).
# If true, will fully override default configuration by options from `_data/next.yml` (override). Only for NexT settings.
# And if true, all config from default NexT `_config.yml` have to be copied into `next.yml`. Use if you know what you are doing.
# Useful if you want to comment some options from NexT `_config.yml` by `next.yml` without editing default config.
override: false代表我們可以在最外層的source 建立 /_data/next.yml的檔案去複寫default 的yml,並且裡面只需填入想要的變更即可
1
2
3
4
5
6
7scheme: Pisces
back2top:
enable: true
# Back to top in sidebar.
sidebar: false
# Scroll percent label in b2t button.
scrollpercent: true以上的設定就會蓋掉default 中相同的設定,且這個設定檔也可以上傳至git,以利後續再github action 做的時候樣式不會跑回default
GitHub Action 配置
官方文檔有相關配置,建立.github/workflows/pages.yml後輸入內容,理論上推到main這個branch時他就會自動啟動了,node ver.記得設定與你本機相同,另外/public 要加入.gitignore中,此資料夾不應被上傳
1
2
3
4
5
6
7
8
9
10
11
12
13
14
15
16
17
18
19
20
21
22
23
24
25
26
27
28
29
30
31
32
33
34
35
36
37
38name: Pages
on:
push:
branches:
- main # default branch
jobs:
pages:
runs-on: ubuntu-latest
permissions:
contents: write
steps:
- uses: actions/checkout@v3
with:
token: ${{ secrets.GITHUB_TOKEN }}
# If your repository depends on submodule, please see: https://github.com/actions/checkout
submodules: recursive
- name: Use Node.js 16.x
uses: actions/setup-node@v2
with:
node-version: '16'
- name: Cache NPM dependencies
uses: actions/cache@v2
with:
path: node_modules
key: ${{ runner.OS }}-npm-cache
restore-keys: |
${{ runner.OS }}-npm-cache
- name: Install Dependencies
run: npm install
- name: Build
run: npm run build
- name: Deploy
uses: peaceiris/actions-gh-pages@v3
with:
github_token: ${{ secrets.GITHUB_TOKEN }}
publish_dir: ./public配置完之後就會發現會失敗,此時會需要黏貼公鑰及私鑰,此篇有詳細步驟,我這邊是採用官方文檔 + 黏貼公司鑰
Hexo + GitHub Actions 部屬網站遷移全紀錄
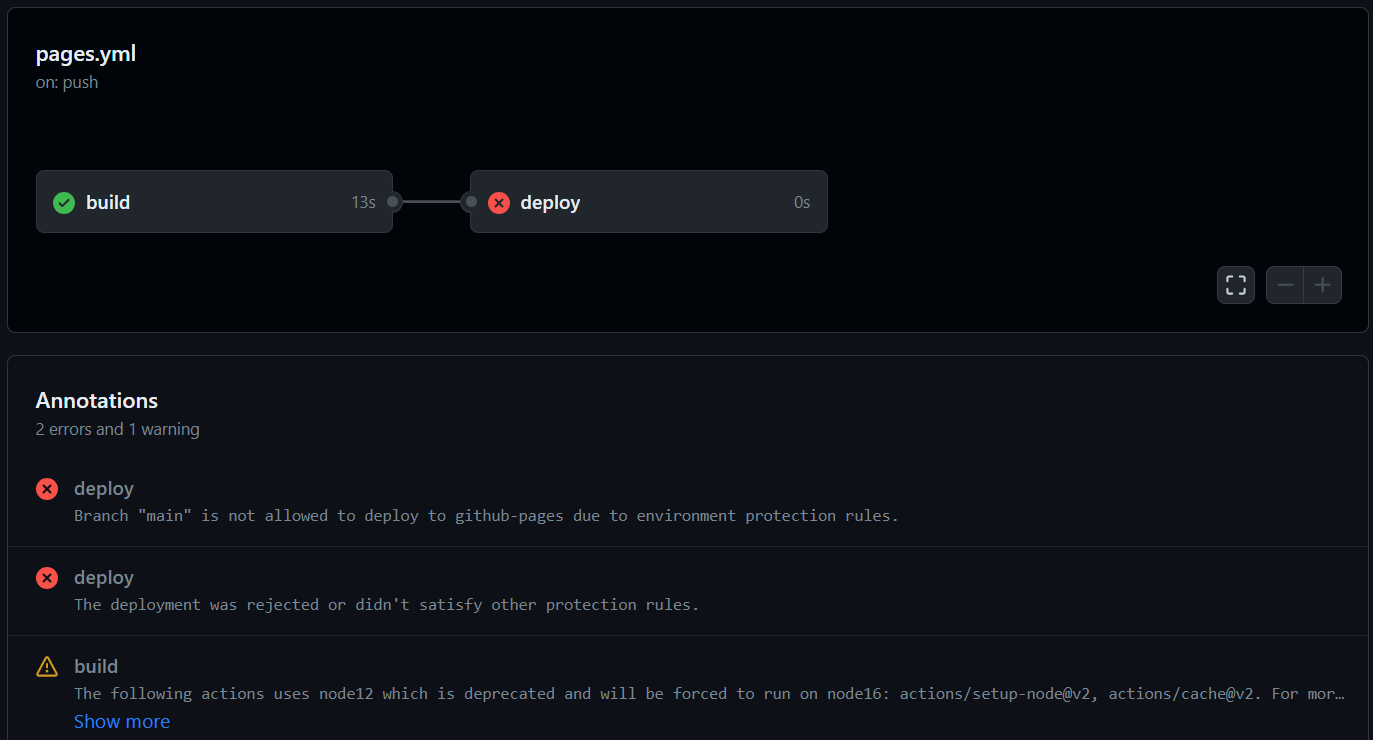
此步驟中在deploy時我有出現一個小錯誤

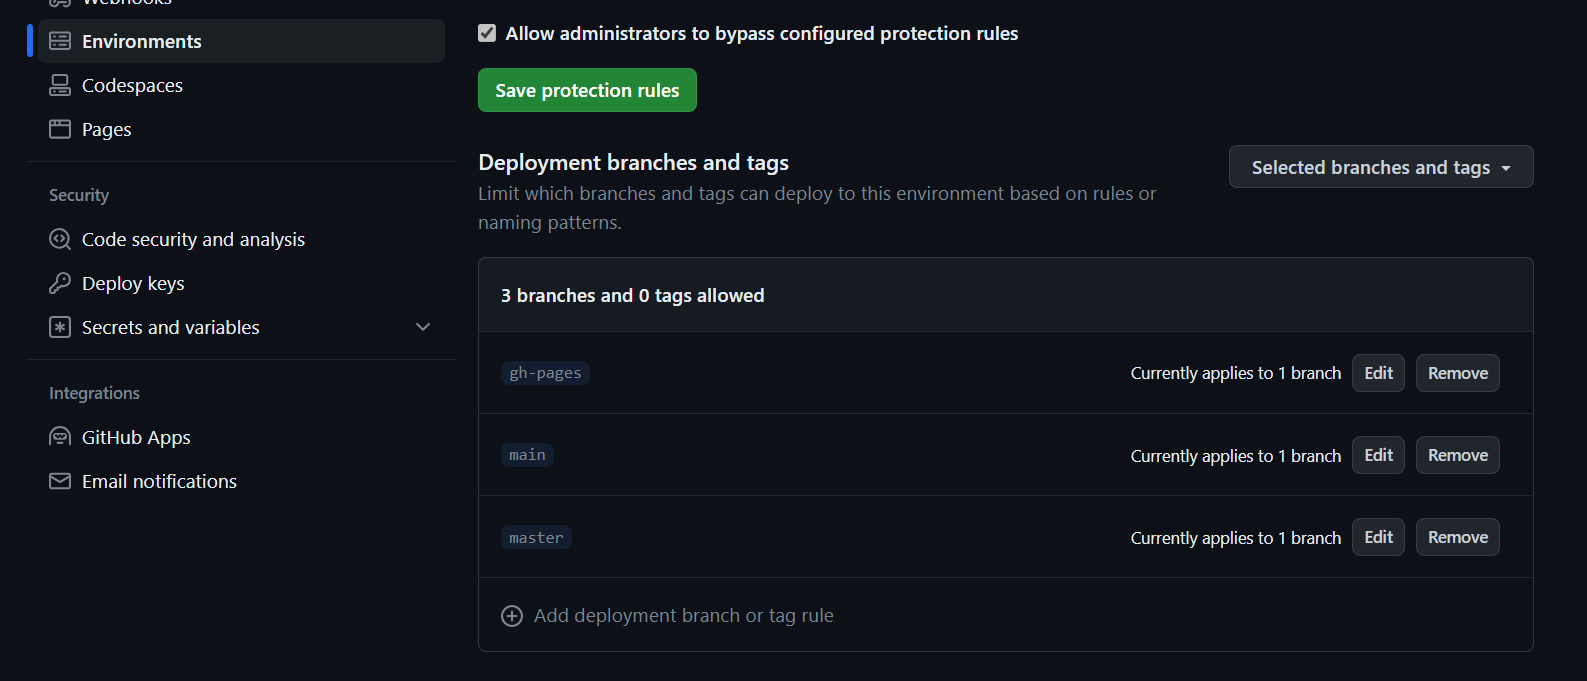
可以發現gh-page 被保護住了,此時需去setting→environment點及gh-pages的protect rule變更或新增你自己想要的branch

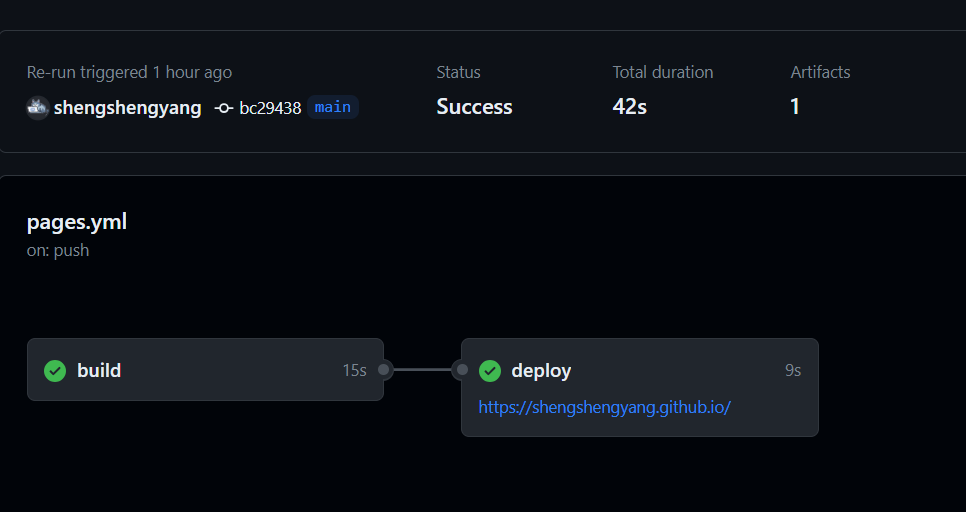
部屬成功,可喜可樂
最後進到github action 可以看過程,最後制網址就可以看到自已的靜態網頁已佈署上去
